Friday Football Round-Up

Fall is my absolute favorite time of the year. The leaves are changing. Mornings are crisp, begging you for a run. Afternoons are pleasant, perfect for nice long walks with my favorite Kiwi.

But most importantly, fall is the best because it means football is back!

Being from the south and an alum of a school where football is king, life has always been just a bit more exciting in the fall. Lots of travel to away games, lots of planning and cooking for tailgates, and lots and lots of friendly trash talk. {Unless of course you’re a Tennessee or Florida fan in which case, it’s not that friendly.}

Of course, this weekend is really a double whammy–Labor day weekend and the football kick off. So today I’ve rounded up some great recipes, crafty tailgate decor, and precious game day dresses {because in the South we dress up for football games} to get you in a celebrating mood.

Enjoy the long weekend and GO DAWGS!

Kiwi+Peach: Friday Football Round Upvia*

{decorate}

My weekend project. These pillows would really class up a place.

Build your own corn hole set. {Bean bag toss for the uninitiated. It’s not what you’re thinking.}

This cutting board would be perfect.

Some precious {free} printables.

{wear}

somanycutedresses.

but seriously, I may or may not be ordering this one.

…and maybe this one too.

{eat}

from our archives:

You could throw these blue cheese burgers on the grill.

I shall call these tiger tails, and they shall be destroyed. {too intense?}

You could also give these maple baked beans a whirl.

Need something sweet? Try the strawberry margarita cupcakes.

…or the salted caramel and apple pies. Nom!

from around the web:

Healthy brownies? Stick some raspberries on top and they’ll be yelling Go Dawgs!

Not so healthy puppy chow.

…or this slightly healthier version.

*Pinterest is not a legit source. If you know who made this beaut please let me know so I can update it. Responsible pinning y’all.

Turkey Joes

When I was cooking just for myself, Sunday nights I would make a big batch of something and then just eat on it for lunches and dinners that whole week. I had about four things that I would rotate between which is good because when you’ve been eating something pretty much every meal for a week you don’t really want to see it again for a month. I will eventually get around to sharing all of these recipes {in their new and improved versions} because they really are still some of my favorites, but today we’re just going to talk about one.

Sloppy joes.

Or rather, turkey joes since I make them with ground turkey breast as opposed to ground beef which, after one of my foods classes, really freaked me out in college.

Ground turkey breast is pretty hard to find here in Deutschland, so these days, more often than not, I end up using beef. I will say that the grass-fed cows that led happy lives in the Alps before they ended up on my plate freak me out a bit less that the stuff we talked about in that class.

However, if I ever see ground turkey in the shop here, there is usually a squeal of delight {which gets many disapproving looks from nearby Germans} and I snatch that sucker up like they’re going to take it away from me {which they probably are because they think I’m insane}. What can I say? Turkey joes are a comfort food for me, and there is nothing like having your comfort food made just right.

I’m curious, what is your ultimate comfort food? When I was sick as a kid my grandmother would make me a fried bologna sandwich. You probably won’t be seeing it on the blog anytime soon, but man! Nothing says you’re safe and loved like mixed meat fried in bacon grease slapped between two pieces of Sunbeam, the whitest white bread imaginable, with globs of mayo. Am I right?

Probably not.

Kiwi+Peach: Turkey Joes

Turkey Joes

The Slop
1 tsp olive oil
1/2 of an sweet onion, diced
1/2 of a red pepper, diced {capsicum for the Kiwis}
200 grams ground turkey breast
2 tsp chili powder
2 tsp paprika
1/2 tsp cinnamon
1/2 cup BBQ sauce

The Assembly
1/4 cup BBQ Sauce
2 buns

Heat a deep sauté pan on medium high heat and add the olive oil. When it’s hot, throw in the diced onion and red pepper. Stirring occasionally, cook until the peppers are soft and the onions are translucent. This usually takes about 5-7 minutes for me. When you’re happy with the veg, push them to the side of your pan then add the ground turkey, chili powder, paprika, and cinnamon. Use your stirring device to break the meat up and slowly incorporate it into the veggies. Cook until the meat is no longer pink and appears to be cooked through.

{If you’re using ground beef instead of ground turkey breast, I advise doing the meat in a separate pan and draining off all the grease before adding it to the onion+red pepper mixture.}

Reduce the heat to medium low and stir in the BBQ sauce. Let the whole thing simmer away for about 5 minutes or until the BBQ sauce has reduced by about half.

While the slop is reducing and caramelizing and becoming awesome, you can be prepping the buns. Slice them in half and spread about a tablespoon of BBQ sauce on the top and bottom slices. When the slop is ready, spoon a big ol’, sensible size portion of it on the bottom bun. Add the top bun, smush a bit, and dig in.

Prepare to get messy.

Kiwi+Peach: Turkey Joes

Summer Monogram Swap {and Bourbon Buckeyes}

One of the best parts of this blog adventure is the wonderful blogging community that it makes you a part of. Folks that know exactly what it’s like pouring your heart and time into your tiny little corner of the interwebs and hope that the people reading it respond to your voice and what you’re talking about.

There are a seemingly never ending number of opportunities to meet and connect with these other folks. When I saw that one of my favorite style bloggers, Nicole from Probably Polka Dots, was hosting a monogram swap I thought “Why not?”. I’ve never done anything like this before but I really liked the concept of connecting with one or two bloggers and really getting to know them. The fact that I’d get to gift and be gifted something personal and unique made it even better.

Our group was a trio. I was entrusted with finding the perfect gift for Susan, a lifestyle blogger from Ohio. I have loved every minute of getting to know Susan and spending time in her space, Charming Lucy. She is creative and stylish, but the thing I find most inspiring about her blog is how highly she talks about her precious daughter and blog namesake, Lucy. Be sure to head over to her blog to see what I ended up giving her!

When I found out that Sarah, a style blogger from Kentucky, was going to be picking out my monogramed goodie I was pretty pumped. The girl has style as evidenced by her blog Simply Sarah Style, so I knew I’d be getting something awesome. Since we are all about the kitchen over here, she picked out some cute personalized recipe cards and a monogrammed tea towel. Thanks so much Sarah!

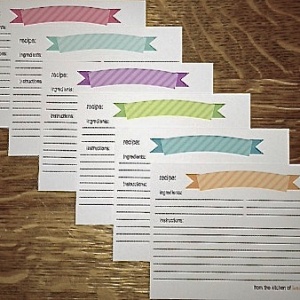
tea towel     recipe cards
photo credit: the mama

Ladies, thank you all so much for making the swap a great experience. And, because y’all are both so awesome, I thought I’d share a little recipe I cooked up that was inspired by both of y’all.

Football season is THREE days away and, for the football devoted, that means lots of tailgating, football watching get togethers, and a significant amount of cooking every weekend. {At least, that is what it would mean that for me if we were in the States, but we’re not. So football season means 2am game starts and lots of gnashing of teeth if the video feed freezes.}

One of the things I’ve learned in my years of tailgating is that if you put liquor in it, folks will eat it. Traditionally a tailgate favorite for fans of The Ohio State Buckeyes {sorry Michigan fans, I do love you}, I think that regardless of your school allegiance, these are a bite sized, Kentucky bourbon filled dessert that folks can get on board with.

Normal buckeyes are pretty simple–peanut butter, powdered sugar, and chocolate. In a effort to up the nutritional value of these a bit, I wanted to eliminate most of the refined sugar, so instead of powdered sugar, we’re using peanut butter cookie crumbs and mixing it with cream cheese and bourbon and then dipping it in dark chocolate. Bam.

Kiwi+Peach: Bourbon Buckeyes {whole grain, no refined sugar, and so, so delicious}

Bourbon Buckeyes

The Crumb
1/2 cup peanut butter
1/3 cup maple syrup
1 tsp vanilla
3 Tbsp coconut oil, melted
1 cup whole grain flour {I used spelt.}
1/2 tsp baking soda
1/4 tsp salt

The Mix
6 ounces {175 grams} cream cheese
2 Tbsp bourbon
2 Tbsp maple syrup

The Cover
8 ounces {200 grams} of dark chocolate

Preheat the oven to 350°F/175°C.

In a large mixing bowl, mix the peanut butter, maple syrup, vanilla and melted coconut oil together. Slowly add in the flour, baking soda, and salt until they are just incorporated.

Spoon golf ball sized balls of dough onto a lined baking sheet and press flat with a fork. Pop them in the oven and bake for 10 minutes or until they are crispy.

You could stop here and just have some peanut buttery cookies, but I recommend you keep going. Its about to get delicious.

When the cookies are finished, let them cool for a quick minute, and then put them into your food processor. Process until there are no chunks of cookie left, just crumbs.

In a small bowl, whisk the bourbon and maple syrup into the cream cheese. Empty the cookie crumbs into a large mixing bowl, and add the cream cheese mixture. Mix until it’s fully incorporated.

Roll into golf ball sized balls and pop in the freezer for at least 30 minutes.

To melt your chocolate, break the bar up into small pieces and put the pieces in a bowl. Pop the bowl in the microwave for a minute. Stir the chocolate. If it’s not completely melted yet, keep going in 15 second intervals stirring well in between each. It shouldn’t take more than 1 or 2 more hits.

Dip the bottom of your peanut buttery ball of goodness into the chocolate then transfer to a parchment paper lined tray. Let the chocolate harden and then store in the freezer until about 30 minutes before you’re serving them.

This should get you about 20 buckeyes. Adjust your amounts accordingly, but just a warning, everyone at your tailgate will be gobbling them up!

Pineapple Glazed Chicken Kebabs

This past weekend was a rainy one. We cleaned, we organized, we did a step-by-step photo shoot. I sewed until I broke my last needle. But really, we wanted to be at the lake. We wanted to be grilling. We wanted to soak up every last bit of summer in Bavaria.

So could we grill when it was bucketing? No, but we could still make kebabs.

Pineapple Glazed Chicken Kebabs

The Marinade {inspired by Tupelo Honey Cafe}
1/3 cup pineapple juice {orange or grapefruit juice would work as well}
3 Tbsp soy sauce
3 Tbsp olive oil
1 clove of garlic, minced
1-2 chicken breasts

The Veg
1 bell pepper {I generally use some combination of red, green or yellow.}
1 medium sweet onion
4-5 button mushrooms
1/2 of a zucchini

Soak 6-8 bamboo skewers in water. {This will prevent the wood from splintering and if you’re grilling, it will keep the wood from burning.}

Combine all the ingredients for the marinade in a tupperware container. reserve a couple tablespoons and set aside. Cut the chicken into bite sized cubes and pop it in the marinade. Best case scenario, marinate the chicken overnight, but if that’s not possible at least marinate it while you’re prepping the veggies. {If you can do overnight, I swear the chicken will actually melt in your mouth.}

Wash and dry your veggies then cut them all into bite-sized bits.

Thread the skewer through the veggies and chicken. Get creative with the order. It doesn’t really matter/have to be exact. {Unless you’re OCD, in which case, carry on with your patterns.}

If you can grill these babies, do it! We couldn’t due to rain/lack of grill device, so I just popped them in a pan on medium high heat for about 3-4 minutes on each side. Remember that bit of the marinade you reserved before you put the chicken in? Brush it over the kebabs each time you flip it.

Perfection.

Serve with some green beans or maybe some potatoes or baked beans and dig in!

{This post contains an Amazon affiliate link. That means that if you head over to Amazon from the link and choose to buy the book, a tiny bit of the money you spent on the book will come back to me for the referral.} 

Friday Links

It’s Friday friends, and it’s a red-letter day in the Kiwi and Peach household.

This one time, I moved to Germany and was so scared to get my hair cut that I just let it grow and grow and grow until I found myself waking up in the middle of the night tangled in my own hair. Seriously, I’d have dreams about people pulling my hair and would wake up to find that I was just stuck.

So I chopped all my hair off. In a burst of courage {assisted by some wine}, I made an appointment with a Kiwi who owns a salon here in Munich and he made the chop. 13 inches folks– I feel so free!

Kiwi+Peach: Friday Links

My project for the weekend.

Along with trying out some of these short hair styles.

What’s that about a canoe and American beer tasting like water?

Really want to give this recipe a shot.

…and this one too.

Wonderful advice for 20 somethings.

This cracked me up.

Words we could use in the English language. {My fave? Backpfeifengesicht}

Striving for this.

Ready to get your nerd on? {Bonus points.}

Here’s to this kid for trying to start a conversation about school lunch.

60 Minute Whole Wheat Focaccia {and Pizza Dough}

I really like the idea of making my own pizza crust, bread, pasta, etc. There are so many perks to doing it yourself: you can make it whole wheat, you can eliminate the refined sugars and replace them with natural sugars, you can save some moolah, and, most importantly, you can avoid making another trip to the store when you’ve forgotten bread on both of your previous trips to the store that day. {This is a completely hypothetical situation. No way I’m that scatterbrained.} But the thing is, while I like the idea, it always ends up being more work than I bargained for.

Every night, it seems, I inevitably forget what I’m making for dinner. I mean, I know what stuff I’m making that week, but I forget what we’re having it. So that wonderful plan I had when I made the meal schedule for spending a lovely afternoon kneading dough and making my own homemade pizza dough turns into me being highly productive organizing my Pinterest board for the seven millionth time and then freaking a little when I realize I’m making pizza and have no dough. Let’s be real, the majority of folks don’t have all afternoon to carefully craft the perfect pizza crust. Folks need something quick because you’re busy. Am I right or am I right?

But I still want to have homemade pizza, and I still don’t want to go to the store. Don’t worry folks, it can be done! Based off a method I saw over at Crunchy, Creamy, Sweet, this really is one of the quickest and most versatile bread recipes I use. It can be used for sandwiches, deep dish pizzas, or even regular pizzas, and the best part is that it lakes less than 60 minutes.

Kiwi and Peach: Homemade Bread in 1 Hour


One Hour Focaccia

3/4 cup hot water
1 Tbsp honey
1 Tbsp yeast
1/2 cup + 1/2 cup whole wheat flour {plus about 1/4 cup-ish for kneading}
1/2 cup + 1/4 cup all purpose flour
2 Tbsp + 1 Tbsp butter
1/2 tsp salt

Preheat your oven to as low as it’ll go. For me it’s 120°F/60°C.

First thing you need to do is to proof the yeast. In a large mixing bowl, measure your water and honey. Whisk until the honey dissolves and then add your yeast. Whisk it a bit more and let it sit for about 10-15 minutes to proof. When you come back to it, it should have about doubled in size and be all bubbly. If it is.. your yeast is alive!

Add your first 1/2 cup of whole wheat flour to the proof and give it a stir. Then add the 1/2 cup of all purpose flour and mix until the flour is incorporated.

Melt your butter and add 2 tablespoons of it to the mix along with the salt. Give it a stir.

Sprinkle in the second 1/2 cup of whole wheat flour and the 1/4 cup of all purpose and mix until it’s incorporated. At this point your dough should be forming a ball and pulling away from the bowl, but it’s still really sticky. Sprinkle some whole wheat flour over the top of the dough and flour up your hand. We’re about to get messy.

Working in the bowl {because really, who wants to clean up the counter top?} knead the flour into the dough until the dough stops being sticky and forms a pretty solid dough ball.

Now we can go one of two ways.

If you’re making focaccia:

Grease a skillet {or regular frying pan, just wrap the handle with tin foil} and plop that dough ball in the middle of it. Push the dough out to the sides of the pan.

Turn the oven off and pop the pan in the oven for 20 minutes to let it rise.

After those 20 minutes, remove the pan from the oven and crank it up to 400°F/200°C. Brush the remaining butter on the top. {You can add all sorts of tasty stuff at this point too. Oregano, parmesan cheese, pizza toppings, the list goes on and on. Use your imagination!}

Return the pan to the oven it’s preheated and bake for 20 minutes.

When its finished, you can just turn the pan over and your lovely focaccia should just fall out. Let it cool for a quick minute and then you can slice it and make any kind of sandwich your heart desires. {We like this one and this one.}

If you’re making a pizza dough:

Line a baking tray and plop your dough ball on there.

Turn the oven off and pop the baking tray in there for 20 minutes to let it rise. While it’s rising, you can be preparing your pizza toppings.

After those 20 minutes, remove the baking tray from the oven and crank it up to as high as it’ll go. {For me that’s 475°F/240°C.} While the oven is preheating, use a well floured rolling pin {or your hands} to roll your pizza dough out until it’s about 1/4 in thick. {I mean, I guess you could try the throwing it in the air technique, but I’m not that much of a risk taker.} Fold the sides up a bit to make a crust/handle part for your pizza then load that baby up with you delicious, delicious pizza toppings.

Pop it back in for 20 more minutes, and your beautiful, delicious pizza will be ready to go!

The White

Remember last week when I told y’all all about my awful luck with restaurants staying in business and I shared one of my favorite places to eat in Athens {Georgia not Greece}? Well wouldn’t you know it…

Just kidding. They didn’t close. {Freaked you out there didn’t I, Mama?}

Oh man, now I’ve really jinxed it.

But really how could they with all the delicious things that have going on. Today’s recipe was inspired by my Mama’s favorite, the White Pizza. Being the queen of neutrals that she is, it really isn’t surprising that she’d go for the most monochromatic option, but what is surprising is how flavorful that sucker is! It’s strong on the garlic and has the perfect blend of melty cheeses and crisp, buttery focaccia.

Kiwi+Peach: The White

The White

The Mix
1/2 cup ricotta cheese
1-2 cloves of roasted garlic
1/2 tsp salt

The Assembly
2 large wedges of focaccia
4-5 fresh basil leaves, sliced
1/2 ball fresh buffalo mozzarella

In a medium sized bowl, mix the cheese, garlic, and salt together well.

Split your focaccia wedges down the middle to make two slices. {You know like for a sandwich.} Liberally spread the mix on both slices. Sprinkle the bottom slice with the basil strips and then cover with chunks of your mozzarella.

Pop everything in the oven on broil {or grill for y’all Kiwis} for about 5 minutes or until the mozzarella has melted. When its finished top it off and enjoy!

Cinque Terre Food Guide

When we started planning this Tour of Italy, I knew that no trip would be complete for me without a visit to the Cinque Terre. It has been on my list since before study abroad 4+ years ago. When I was over here for study abroad, we had only four weekends free to travel wherever we wanted to. Obviously I had a list a mile long, but we had to choose carefully. In the end we opted to travel places that we thought we wouldn’t come back to on holiday. Since pretty much all of us had been to Italy before and we wanted to check different countries off our lists and since Italy is like tourist destination no. 1 in Europe, the Cinque Terre didn’t make the cut. {Ironically, the places that we did choose were Prague, Amsterdam, Paris, and Interlaken. Man, us Capital T’s–T stands for thrill– were adventurous.}

There as no way I was missing Cinque Terre this time around. I couldn’t wait to see those colorful little towns nestled into the sides of cliffs. I couldn’t wait to hike the famous Sentiero Azzuro. Most importantly thought, I couldn’t wait to get my hands on some of that pesto! I mean, this is where pesto was invented, so you know it must be good.

Kiwi+Peach: Cinque Terre Food GuideManarola

We stayed in Vernazza, so that is where we ate dinner most nights. I am sure there are delicious restaurants in each town, but this is where it made sense for us to eat.

The first place we hit was Taverna del Capitano. It is right there in the main square and while I was a bit worried it would cater to tourists, I was pleasantly surprised. As we sat there sipping our wine, we watched all the  neighborhood children running around playing as their parents stopped for a chat. Our waiter, an older man, was one of the most sarcastic, helpful, and hilarious waiters we had on the entire trip. He took the time to really explain what made the local delicacies special and then added that we should take our time, he had to be there until 11 anyway.  I went for the very local trofie al pesto. {Told you I couldn’t wait to try the pesto!} Trofie is a pasta made from chestnut flour that is pretty unique to that region. It’s simplistic, it’s rustic, and it’s so very, very tasty. The Kiwi ended up ordering the black seabream that came with a deliciously simplistic roasted tomato and homemade chips.

Kiwi+Peach: Cinque Terre Food Guide Kiwi+Peach: Cinque Terre Food Guide

On our last night, the Kiwi treated me to dinner at Belforte. The restaurant, which is in the old fort, is one of the nicest restaurants in town. We made a reservation a couple days before just to make sure we would have a table.  The views of the hills and the sun setting over the Mediterranean were just amazing. The staff, who speak perfect English by the way, made you feel like you were a part of their big happy family. Before the trip, I had read that it was one of the things you had to try in Liguria were the anchovies. While neither of us are huge anchovy fans, we decided that if they weren’t good here, they wouldn’t be good anywhere, so we took the plunge and ordered the mixed anchovy antipasti. Some were salted, some were fried, and some were marinated in lemon. It made a believer out of me. My favorite were the salted ones with the little banana peppers. For my main I had a delicious squid ink pasta with shrimp sauce which was better than I could ever have imagined. The Kiwi had a mixture of fried fish, prawns and a huge, spectacular-looking scampi. He says he’d go back. However, the rest of the the meal doesn’t hold a candle to dessert. Caramelized strawberries with homemade vanilla bean ice cream. Enough said.

Kiwi+Peach: Cinque Terre Food GuideKiwi+Peach: Cinque Terre Food Guide

Kiwi+Peach: Cinque Terre Food GuideKiwi+Peach: Cinque Terre Food Guide

other Cinque Terre tips

Check what sections of the Sentiero Azzuro are open before you head out to hike. At the moment only the Corniglia to Vernazza and the Vernazza to Monterosso sections are open. There is an alternative route from Manarola to Corniglia though, but it’s definitely a bit harder of a hike than the Trail No. 2. If hiking isn’t your thing though, you can also access the towns by train.

From my take on the towns, I would say that Riomaggiore and Monterosso are the most touristy. If you’re looking to really feel like part of the the town, stay in one of the three middle ones.

The Kiwi thinks that Corniglia would be a great lunch stop, but we can’t vouch for that. I can however vouch for their frozen yogurt. I have no idea what the name of this place was, but if you see a sign for frozen yogurt with fresh squeezed lemon juice, honey, and nuts, go there!

Linked with Travel Tuesdays

Creamy Goat Cheese Pasta with Sun-dried Tomatoes

Having spent pretty much my entire life in the world of education either as the daughter of a teacher, a student, or a teacher myself, August has always meant one thing–back to school. I know that lots of folks in other parts of the country don’t start back until September {or, you know, February if you’re in NZ}, but in Georgia, we go back in August.

Maybe y’all that go back in September have the right idea though. August is still summer! The weather is still beautiful and there are lots of beautiful summery fruits and veggies in season and just asking to be carefully crafted into the most perfect summer dinner.

But once we go back to school… there just isn’t time! Especially in those first couple of weeks. The trick, I’ve found, is to have a few super quick weeknight meals up your sleeve that you can make on auto pilot. So for all my teacher friends who are back in school here is one of those recipes. It’s a super quick and healthy alternative to eating out multiple nights a week and, let’s face it, much cheaper. If the carnivore in your house really needs some meat, you can always stir in some shredded rotisserie chicken.

Are you back in school yet? What are some of your go-to week night meals? Some of our other favorite quickies are the cashew chicken noodles, Greek couscous with zucchini, and of course, my summer favorite.

Kiwi+Peach: Creamy Goat Cheese Pasta with Sun-dried Tomatoes

Creamy Goat Cheese Pasta with Sun-dried Tomatoes

{adapted for two from Martha Stewart}

The Pasta
6 oz whole wheat rigatoni {or some other kind of tube pasta}
1/2 cup sun-dried tomatoes, sliced
pinch of salt

The Sauce
2 tsp. olive oil
2 Tbsp. pine nuts {or sliced almonds}
1 clove of garlic, minced
1/4 tsp. red pepper flakes
1 cup white wine
3 ounces goat cheese, crumbled {plus a bit more for the top}
8 or so fresh basil leaves
fresh ground black pepper

To get started prepping, heat a large pot on medium high heat and boil your jug. Slice your sun-dried tomatoes into thin strips.

Pour the boiled water into your pot and when it has returned to a boil, add the pasta, sun-dried tomatoes, and salt. Cook the pasta, stirring occasionally, according to the package directions {usually 8-10 minutes for the tube pasta}. When its finished, drain the water then return the pot to the heat. {Just leave the pasta and sun-dried tomatoes in the strainer for a minute. We’ll get back to that in a quick minute.}

Drizzle the olive oil in the pot and then add your minced garlic, pine nuts, and red pepper flakes. Mix well and stir continuously until the pine nuts have toasted a bit. Add the wine and let it cook until the wine has reduced by half. Grab your pasta and sun-dried tomatoes and pop it back to the pot. Add the goat cheese and basil then stir very well.

Plate up and then sprinkle with crumbled goat cheese, a few grinds of black pepper, and a couple basil leaves.