On Work/Life Balance + Low Country Boil

I’ve been hesitant to jump back into the blog because I have been a total hypocrite and I knew I’d have to fess up. I have some ‘splainin’ to do about the not so homemade meals we came to rely on when I went back to work. You see, when you start your first year teaching, work a part time job as well, buy a house, and plan a wedding in the same year, there is very little time to think about anything other than the task at hand and how very, very exhausted you are. I’m totally making excuses here.

When I read back through old posts and see sentences like “it only takes an extra couple of minutes,” I cringe. Please girl! Extra twenty minutes?! Those words were clearly written by a lady who has too much time on her hands. Those couple of extra minutes it takes to make stuff by hand is just not happening on a week night because that’s an extra couple of minutes that I could be getting my never ending work done (or giving thought to exercising but then crashing on the sofa instead.)

I don’t have any radical ideas on finding balance between my domestic and professional life. While it’s something that I think most women struggle with at some point or another, everyone is in a different situation. When my professional life was on hold, I threw my energy into the domestic life–exploring cool, new food, testing my skills in the kitchen, putting a house together–as a form of self preservation. Look, see, I accomplished something today. Even if it only benefited my boyfriend/fiance/husband, I created something I can be proud of.

Then, quite suddenly, I had other work to do. I couldn’t concentrate on that stuff any more for far more pressing matters like teaching kids that mac and cheese wasn’t a vegetable. Zane always bragged about the variety of dinners I made, that he never got bored because I was always coming up with something new and I took a lot of pride in that. However between meal planning, grocery list making, grocery shopping, and cooking, I couldn’t keep up. I felt like I was letting not only him, but you guys down as well if I couldn’t keep the fresh new dishes flowing. So I stopped blogging…
Kiwi and Peach: Low Country Boil

…and life went on. Our priorities shifted and we started to find that balance. Zane cooked more. We discovered the wonders of utilizing our freezer. We started working smarter, not harder. We ate good food.

But I’ve missed sharing it with you guys and hearing and learning from you…

Like that time we tried Blue Apron, I wanted to talk about it. To chat about the awesome recipes and abhorring amount of packaging. (Seriously, what are you supposed to do with 4 huge icepacks every week?!)

Or those times when the event company our venue used couldn’t keep a wedding planner so we had 4 different wedding planners over the course of a year. (How do you stay organized through that?!)

Or that time we threw a bonfire the night before our wedding complete with a s’mores bar and things were crazy but it ended up being almost as much fun as the wedding itself.

Or each of those times we figured out how to get dinner on the table in under 30 minutes, when you know you’ve nailed it, and you feel like “We are the Champions” should be playing in the background.

I’ve missed chatting with you guys.

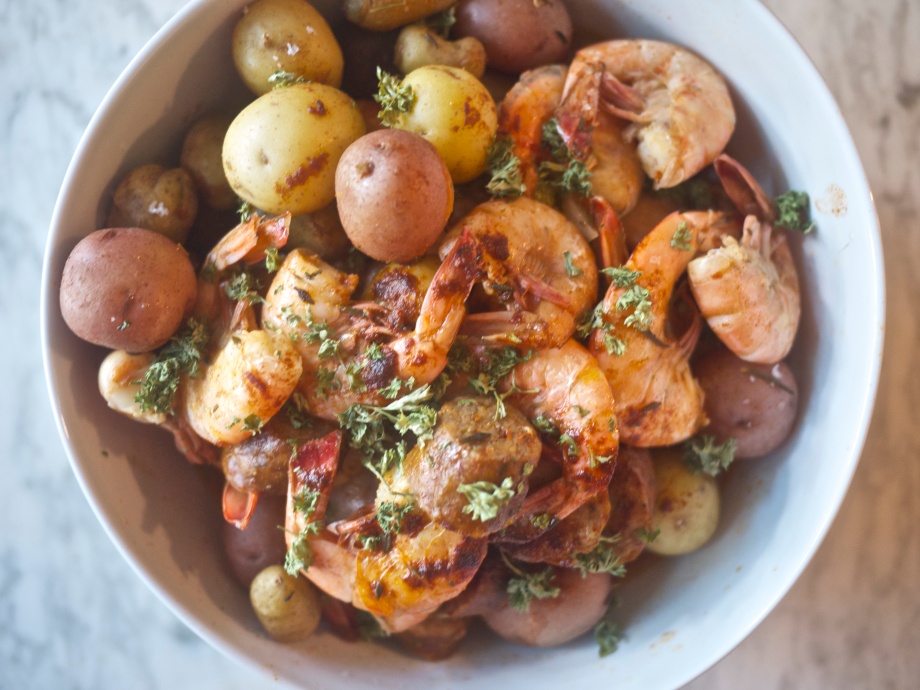
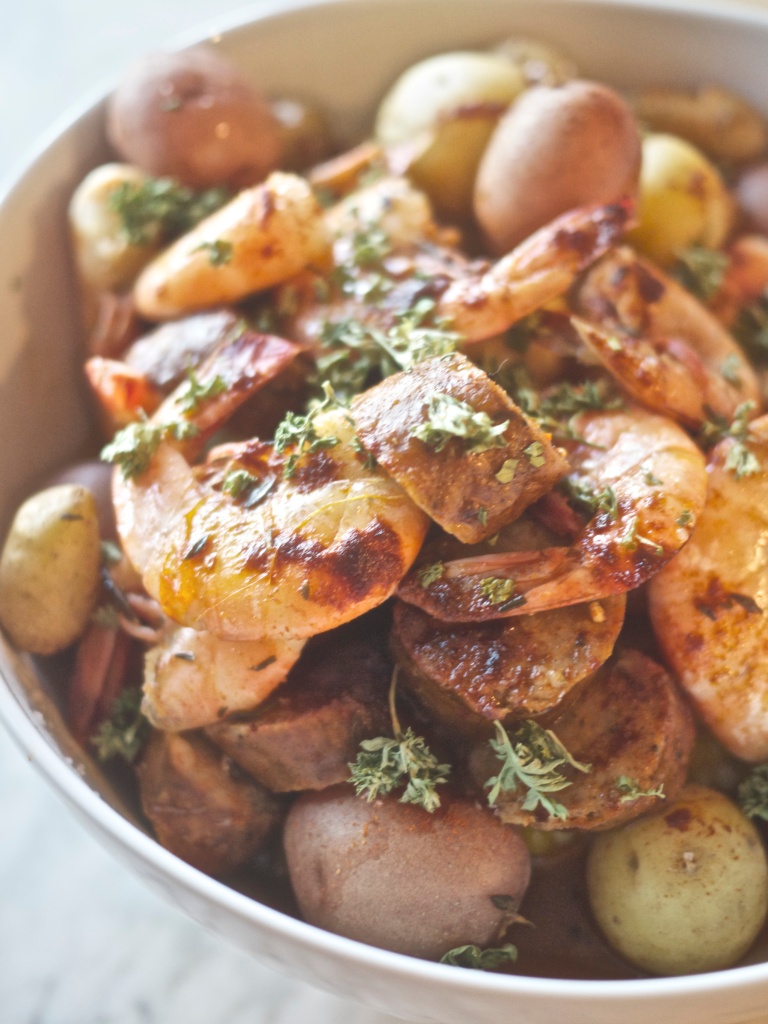
So I’m just going to leave this here for you. Have you ever done a low country boil? There was a sorority at uni that hosted a big low country boil every year as one of their fundraisers. It was always a huge hit, but I had never thought to try and make it myself. I tried it for the first time earlier this summer after seeing Joy the Baker’s post and it has become one of our favorites. There is next to no prep. You just throw things in and 30 min later you have dinner. It’s messy to eat, but that’s half the fun. It’s also super easy to scale up or down if you want to make some to eat on for lunched during the week or if you’re having folks over.
Kiwi and Peach: Low Country Boil

Low Country Boil

{serves 2}

4 cups chicken stock
4 cloves of garlic
1/2 of a red onion
juice of 1 lemon
3 sprigs of thyme
1/4 cup creole spice or any cajun spice
3 tbsp salt
1 pound baby potatoes
2 ears of corn
1/2 pound of raw shrimp
2 links of andouille sausage
2 Tbsp melted butter
3 Tbsp chopped fresh parsley
salt, pepper, and paprika for sprinkling

In a large pot bring the stock, garlic, red onion, lemon juice, thyme, salt and spice to a boil. Add the potatoes then reduce to a simmer. Cook 15 minutes then add the corn. Cook 5 more minutes. Add the shrimp and sausage and cook 5 more minutes. Remove from the heat and let sit for 5 minutes.

Use a slotted spoon to transfer the potatoes, corn, shrimp and sausage to a serving bowl along with about a 1/2 cup of the broth. Pour the melted butter over the top and sprinkle with the parsley, paprika, salt, and pepper.

Turn on “We are the Champions” and serve.

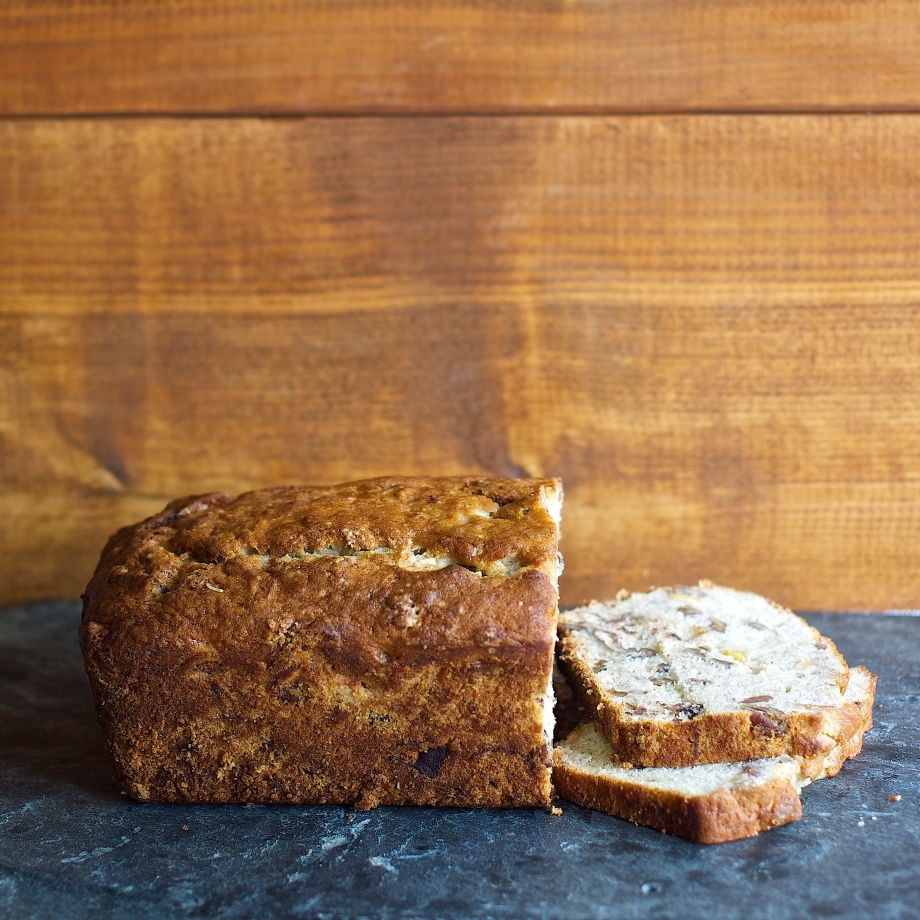
Bourbon Peach Chocolate Chunk Banana Bread

Tis the season for lots and lots of visiting. Hope y’all are following along with us on Instagram because while it might be a bit more quiet than usual over here, it’s certainly not quiet in real life! Ireland was absolutely stunning and deserves a post unto itself. We had some wonderful moments and surprisingly, some really delicious food! I have tons of pictures, tips, and food recommendations with y’all, but it’ll have to wait…

The Kiwi’s folks arrive tonight!

When we told them we were engaged, one of the first things his mum said was that she wanted to come for the engagement party. To be honest, we really, really wanted to have one, but seeing as how the whole point is for the families to get to know one another we didn’t see much point if they couldn’t be here. We were so excited they wanted to make the trip over to celebrate with us and to meet my family!

With all the folks in town this weekend, we have been cooking up a storm to make sure all of these bellies stay full and happy. One of my favorite things to make for breakfast when we have company is banana bread. To me, baked goods for breakfast is the ultimate treat and having some one make it especially for you is so my love language. When our guest room is a revolving door (which we love, btw), I love making up a few loaves to share.

Bourbon Peach Chocolate Chunk Banana Bread from Kiwi and Peach (via Joy the Baker)

Bourbon Peach Chocolate Chunk Banana Bread

My absolute favorite banana bread recipe is from Joy the Baker via Cup of Jo ages ago. It’s one of the few recipes I follow to the letter, and I’ve never had any reason to stray from her method or ingredients. It’s got almost everything you need in a banana bread; bananas, nuts,  chocolate chunks, and a splash of bourbon.

However, last time I made it, I started getting the itch. We had a spare peach on hand. Peach + bourbon = a winning combination, so I chopped that puppy up in 1/2 inch cubes (peel and all) and threw it in there when I folded in the chocolate and nuts. Just when I thought it couldn’t get any better… Oh my stars, y’all! I didn’t change a thing about the rest of the recipe, so it seems silly to rewrite it here because Joy did such a good job with the orig. Do me a favor though, make this, add peaches (while they’re in season), and wait for your belly (and your guests’ bellies) to be oh so happy!

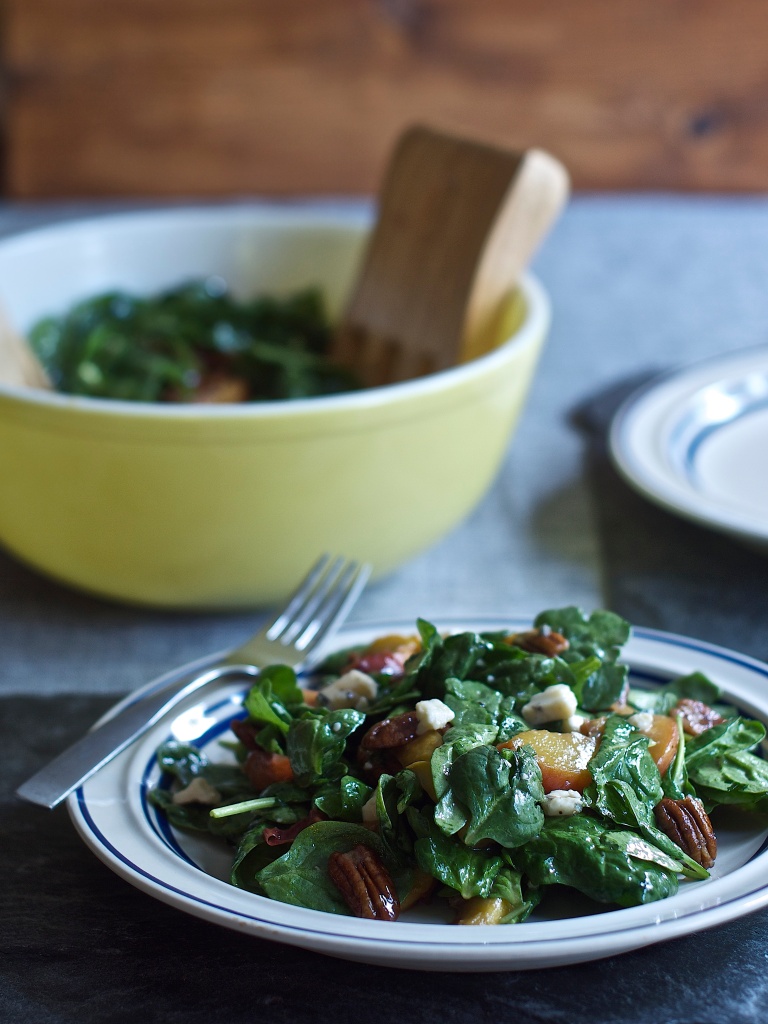
Summer Simplified is Here + Caramelized Peach Salad

Hello there my friends. Thank you so much for all your sweet comments on our engagement! We are so excited to start this wedding planning adventure. I have a feeling there will be lots of DIY projects in our future!

If the blog was a bit silent last week after our announcement, it wasn’t because we were sitting around reveling in engaged bliss. No, we were working our tails off editing and making last minute changes to our brand spanking new meal planning service, The Seasonal Supper. In addition to the 20 recipes for your week-night suppers, we were also able to included 10+ supplemental recipes for things like homemade salad dressing, quick barbecue sauce, and spice mixes that will take your dinner from ordinary to out-of-this-world flavorful. All the i’s have been dotted, the t’s crossed, and our summer collection, Summer Simplified ready for you start using today! Let us start doing the planning for you and take the guess work out of dinnertime. 

sign-up-button

If you want to see what one week of the Seasonal Supper is like, you can download our Think Spring sneak peek. But remember, Summer Simplified has FOUR weeks worth of recipes and planning tools, not just one! To give y’all a little taste of what we’ve cooked up for the summer, I wanted to share a new recipe that is in the collection. Inspired by my favorite salad at California Pizza Kitchen, this has quickly become one of our favorite meals. Peaches, bourbon, blue cheese—summer time doesn’t get much better.

California Pizza Kitchen Caramelized Peach Salad from Kiwi and Peach

Caramelized Peach Salad

{serves 2}

2 peaches
1 tbsp butter
1/3 cup pecans
1/4 cup dried cranberries
1 tbsp maple syrup
pinch of sea salt
1 tbsp bourbon (optional)
1 bag of spinach leaves
3 ounces blue cheese, crumbled

White Balsamic Vinaigrette

2 Tbsp olive oil
2 Tbsp white balsamic vinaigrette
1 Tbsp honey
dash of salt and pepper

Start by heating up a deep sauté pan or cast iron skillet on medium heat. While it’s heating up, slice your peach into long, 1/2 inch thick slices. When it’s hot, melt your butter in the pan and add the peaches. Give them 3 minutes on each side then toss in the pecans, cranberries, maple syrup and salt. Give it all a stir then, if you’d like, deglaze the pan with the bourbon and remove from the heat.

In a large bowl toss your spinach and dressing so that the leaves are coated. Add the blue cheese and the caramelized peach mix from the pan and keep tossing until it’s all mixed in.

Kiwi+Peach Turns One + Spiked Peach Cupcakes with Bourbon Buttercream

Kiwi and Peach has officially been steaming along for one whole year! What a year it’s been?! Y’all have traveled to 5 different continents with us, made a transatlantic move with us and weathered a few storms with us. Y’all have been an integral part of this journey and we want to thank you for being so wonderfully supportive and game for adventure.

Kiwi+Peach Turns One + Spiked Peach Cupcakes with Bourbon Buttercream

Food is the lens through which we experience the world. It’s been a way of expressing myself creatively, and I love getting to share that with y’all. In turn, y’all have shared your experiences with me helping us both to learn and grow. It’s beautiful, this blogging thing. As we look ahead to what the future holds for Kiwi and Peach, we are nothing but excited. There are some huge things coming up in the next year like the launching of our meal planning service, The Seasonal Supper and the opening of our very own Etsy shop! We can’t wait to be able to continue to share our lives with you.

Kiwi+Peach Turns One + Spiked Peach Cupcakes with Bourbon Buttercream

We started the year out as strictly a food and travel blog and have some how ended up more squarely in the lifestyle category. If there is anything I’ve learned, it’s that you have to write from your heart. As we continue to grow, pass through big changes and experience life’s milestones, I find more and more that my heart is leading me to share more than just recipes. We always want to provide you guys with great content that is helpful and insightful and something you can connect to, but life isn’t as black and white as a recipe. You can’t just add one cup good food, half cup decent beer, five teaspoons adventurous travel, throw in a slice of bacon and have a perfect cake every time. Life is more nuanced than that

Kiwi+Peach Turns One + Spiked Peach Cupcakes with Bourbon Buttercream

I’ll be honest. While my heart has been telling me that this is the direction the blog is moving for a while, I have been hesitant to start calling ourselves a ‘lifestyle’ blog because I’m afraid. I’m afraid that y’all just come here for recipes. That my voice and what I have to say about life in general isn’t as strong of a pull as my granola recipe. Maybe it isn’t. But if there is one thing I have learned about this blogging thing it’s that it pays to follow your heart. As long as your voice is true and authentic people will connect with it. So that’s what I’m doing.

Kiwi+Peach Turns One + Spiked Peach Cupcakes with Bourbon Buttercream

Don’t get me wrong, I’ll still be sharing recipes, just not as many. If you are just here for the recipes, I highly suggest you subscribe to The Seasonal Supper. You’ll get 20+ recipes, meal planning tools, and super cute calendars and organizational print goods every three months and all the support I can give to help make meal time at your house go a smoothly as possible.

On the blog though, we are going to diversify a little bit. There will probably be more than a few posts about our home and building a life in a new town. There will be posts about our outdoor adventures in these beautiful mountains we live in. There will be posts about how we orchestrate this DIY lifestyle and how you can streamline the process. And there will be posts about other stuff—fears, joys, fears, success, trials. We sure hope you’ll stick around for many years to come!

Kiwi+Peach Turns One + Spiked Peach Cupcakes with Bourbon Buttercream


You guys just want to eat some cupcakes, don’t you? I’ll stop rambling then and get to it. How better to celebrate this blog’s 1st birthday than with a boozy cupcake stuffed full of peaches and garnished with a slice of kiwi fruit. This is not a ‘healthy’ dessert—this is a pastry flour and lots of sugar kind of dessert, and you know, there is nothing wrong with one of those every now and again. Remember, our favorite saying; “Eat what you want, just make it yourself.” So let’s get to making!

Spiked Peach Cupcakes with Bourbon Buttercream

{makes 10-12 cupcakes}

1/3 cup butter, room temperature
1/2 cup sugar
1 egg
1 tsp vanilla paste {or extract}
2 tsp bourbon
3/4 cup all purpose flour
heaping 1/2 tsp baking powder
1/4 tsp salt
pinch of baking soda
pinch of cinnamon
1/2 cup creme fraiche {or sour cream}
1/2 cup diced fresh peaches

Preheat oven to 350°F.

Beat together the butter and sugar until it’s light and fluffy, about 4 minutes. Then add the egg, vanilla, and bourbon. In a separate bowl, mix together the flour, baking powder, salt, baking soda, and cinnamon. Alternate between adding the flour mixture and the creme fraiche to the wet ingredients until everything is incorporated. Gently fold in the the peaches. Line a cupcake pan with liners and fill each cup 3/4 of the way full. Pop them in the oven and bake for 22-24 minutes. When they’re finished, turn them out onto a cooling rack.

Bourbon Buttercream

3/4 cup butter, room temperature
3 cups powdered sugar
2 Tbsp bourbon
1 tsp vanilla paste {or extract}

Beat the butter and powdered sugar together until they form a ball around the paddle. Gradually add the bourbon and the vanilla paste until the mixture is light and fluffy. Pipe onto to cooled cupcakes and enjoy!


Salt and Vinegar Kale Chips

The kale phenom is not really a thing in Germany yet. While the foodies here in the States were having a heyday with The Chosen Brassica, those of us in Germany were left in a kale desert just wondering, why is it so special? Upon our return to the States, my mission was to find out.

I am a pretty big fan of the dark leafy green family as a whole. Collards, turnip greens, spinach—get in my belly! While I don’t think that kale is a particular stand out among the family, I do think it is delicious and a wonderful thing to eat. Western North Carolina seems to be a very happy place for kale (and it’s friend chard) to grow, so we are literally up to our ears in kale now. From desert to bounty!

One of my favorite ways to eat it though is the ever popular kale chip. Salt and vinegar potato chips are definitely my kryptonite, so the finding something with the same crunch and flavor profile with tons more vitamins and minerals (and like a tenth of the calories) was pretty exciting. You guys know me though, there is no way I’m paying those kinds of prices for something I can make for just the price of a bundle of kale, and there is no reason you should have to either. So let’s make some shall we?

Salt and Vinegar Kale Chips from Kiwi and Peach

Salt and Vinegar Kale Chips

1 bunch of kale
3 tbsp olive oil
1 tsp sea salt
2 tbsp apple cider vinegar

Preheat the oven to 375°.

Destem the kale and shred it into chip sized pieces.

Toss with the olive oil, salt, and vinegar. Spread them out into a single layer on a couple of lined baking sheets and pop them in the oven for 13-15 minutes. Keep an eye on them towards the end. You want them crispy, but not charred.

There you have it—enjoy those guilt free chips! If you are going to eat them straight away, I like to toss the finished chips in a bit more vinegar because I like them super vinegary, but that is totally up to you!

ANZAC Biscuits

One of the most prominent and contentious differences between the American and English languages is the word ‘biscuit’. Most people would tell you that the American translation is ‘cookie’ and leave it at that. Of course, the delicious fluffy buttermilk biscuits we enjoy here in the Southern US are a completely different thing, unknown to the rest of the world. Express a hankering for a fried chicken biscuit to your English-speaking colleagues and hilarity will likely ensue (as Lauren once found out).

We believe there’s more to it than that though—there’s a distinct difference between English biscuits and American cookies. Biscuits are traditionally hard, whereas Americans like their cookies soft. (A quality that appears to often be achieved by loading them up with so much sugar that the other ingredients can barely hold it together.) So we have an agreement on how to resolve the language dispute: soft cookies are cookies and hard cookies are biscuits.

ANZAC biscuits, then, are definitely biscuits. Legend has it that soldiers of the Australia-New Zealand Army Corps, serving in Europe in the First World War, used to receive them in care packages from home. They were baked hard to survive the journey of many weeks or months across the world.

Early on the morning of the 25th of April, 1915, ANZAC troops (under British command) began landing on the shores of the Gallipoli peninsula, in modern-day Turkey. It was the beginning of an ill-fated campaign to wrest control of the Dardanelles straight from the Ottoman Empire, thus opening access to the Mediterranean for the Russian Black Sea Fleet. And every year on the 25th of April, ANZAC Day, New Zealanders and Australians the world over pause to remember just what a colossally bad idea that was. Lest We Forget.

ANZAC Biscuits from Kiwi and Peach

ANZAC Biscuits

{makes 10 biscuits}

The Dry
1/4 cup whole wheat flour
1/4 cup all purpose flour
1/2 cup sugar
1/2 cup old fashioned oats
1/2 cup unsweetened shredded coconut
1/4 tsp baking soda

The Wet
1.5 ounces (5o grams) butter, melted
2 tbsp golden syrup
1 tsp vanilla

Preheat your oven to 350°F (160°C).

In a large bowl combine all of your dry ingredients. In a separate bowl, melt your butter then whisk in the golden syrup and vanilla. Add this to the dry ingredients and start mixing. If it is too crumbly to roll into a ball, add up to two tablespoons of warm water. Roll the dough into golf-ball-sized balls and place staggered on a parchment paper lined baking sheet.

Pop them in the oven for 15 minutes. You’ll know they’re finished when the edges start to brown. Take them out and let them cool completely before gobbling them up. And obviously, they last forever—just not in our house.

Lemony Chicken Rice with Spring Vegetables

Oh spring! I’m so happy to see you.

This winter was rough and if I’m being honest, pretty lonely. Moving to a new town is isolating in an of itself but add the coldest winter in recent history and you have yourself a recipe for a rough transition. I had to get out of the house!

I started volunteering with a non-profit here called FEAST—fresh, easy, affordable, sustainable, tasty— which is what we think food should be. The goal is to give kids the opportunity to have hands-on experiences with fresh fruits and vegetables whether that’s growing it in the garden or cooking it in the kitchen. The hope is that if they grow it themselves and cook it well they’ll want to eat it and enjoy the taste! We use introduce  lots of seasonal vegetables, teach them how to use them, and try show the kids that, when prepared well, veggies can be really tasty! A few weeks ago I was officially got the offer to contract with them and teach the middle school after school programs. It’s amazing and absolutely the perfect job for me. I am so, so happy to be back in middle schools talking about my favorite thing, food! To say it was a sanity saver is an understatement.

Working with beaucoups of vegetables is so refreshing to me after that long winter. I love celebrating these lovely little gems that the earth {and our local farmers} have given us and learning how to craft them in a way that brings out their unique flavors. Eating close to the earth like this keeps us completely mindful of what is in season and what the earth is giving us at this moment in time.

It certainly draws parallels to our meal planning service, The Seasonal Supper. When pulling together our sneak preview, I snuck in one of my favorite new spring recipes that hadn’t made it on the blog yet. While you should absolutely go download the sneak peek {and you should sign up for The Seasonal Supper while you’re at it}, I couldn’t resist sharing it here too.

So this Earth Day, let’s eat close to the earth and let’s be mindful and thankful for all it gives us.

Lemony Chicken Rice with Spring Vegetables

Lemony Chicken Rice with Spring Vegetables

{serves 2}

for the rice:
1/2 cup brown rice
1 1/4 cup well salted water

for the chicken:
drizzle of olive oil
1 chicken breast
dash of salt and pepper
half a head of broccoli
half a bundle of asparagus
dash of red pepper flakes
1 Tbsp chopped preserved lemon {or juice from 1/2 of a fresh lemon}

for the sauce:
2 Tbsp honey
2 Tbsp soy sauce
2 tsp chopped preserved lemon {or zest and juice from 1/2 of a fresh lemon}

Get the rice started first because it is going to take about 50 minutes to cook. Just follow the directions on your pack of rice and make sure that your water is well salted.

Once the rice is on, go ahead and chop your veggies. Cut the woody end off the asparagus and put them in the compost. Then chop the stalks into about thirds. For the broccoli just cut the flowers off the stalk.

Drizzle a bit of olive oil in your skillet and start heating it up on medium-high heat.

On a separate cutting board, because food safety, cut the chicken breast into bite sized pieces. Sprinkle with sea salt and a few grinds of black pepper.

When the pan is hot, add your chicken. Let it cook for a couple of minutes stirring occasionally until it’s sealed on all sides, then add the asparagus, broccoli, red pepper flakes, and preserved lemon. Stir well and cook for an additional 5 minutes or until the broccoli and asparagus are tender and the chicken is cooked through.

While that is cooking, whisk the sauce together in a small mixing bowl.

Once the chicken and vegetables are done cooking, remove the skillet from the heat and pour the sauce into the pan. Give everything a stir to make sure the sauce is fully incorporated.

When the rice is finished, plate it up and enjoy!


Chard Art Orzo

Monday I talked about our CSA and looking forward to getting veggies I might have otherwise not purchased. We are certainly going to be pushing our creativity and the limits of our vegetable consumption this season because in addition to our CSA one of the perks of my new day-job is that I get to bring home leftover veggies. Not half bad, eh?

Today, I wanted to talk about one of those new-to-me veggies—rainbow chard. I’d certainly heard of it but never cooked with it, and if my students’ reactions when introduced to it are any indication, neither had they. I figured it would be a good chance to experiment. So what did we discover? Like lots of dark, leafy greens, it wilts nicely and, as a bonus, the stem is actually pretty tasty too. {It tastes a lot like celery.} It’s a bit sturdier than spinach, so it retains a nice chew when cooked down and is a great textural element in a dish. Also like its dark leafy green fellows, it packs a nutritional punch in terms of it’s vitamin A and K content as well as being a good source of iron and magnesium. It’s a good thing to eat.

I had been thinking about developing a healthy-ish recipe for a quick, spinach artichoke type pasta for a while now because I mean, who doesn’t like spinach artichoke dip? The chard though. The chard really made everything connect for me. {The bacon doesn’t hurt either.} Each ingredient holds it’s own working together to subtly punch you in the mouth with flavor.

Chard Art Orzo from Kiwi and Peach

Chard Art Orzo

{serves two}

½ cup orzo
1 piece thick cut bacon
9-10 stems of rainbow chard, washed
1 clove garlic
juice from ½ of a lemon {or 1 tsp of chopped preserved lemon}
dash of salt and pepper
2 oz cream cheese
2 tbsp sour cream
¼ cup almond milk
5 ounces artichoke hearts
dash of red pepper flakes

Boil your jug and start heating up your frying pan or skillet on medium.

Get your orzo cooking in a pot with plenty of well salted, boiling water on medium high heat. If this is your first time with orzo, don’t worry about it. It’s just like cooking other pastas. Make sure your water is well salted and set your timer for about 10 minutes. When it’s finished, drain it and sit it to the side.

After you get the orzo started, cut your slice of bacon into small strips and pop them in the skillet. While the bacon is rendering, de-stem your chard and tear {or chop} it into 2 or 3 inch pieces. Peel the garlic and either mince it or put it in your garlic press.

Add the garlic to the skillet and stir. Give it about 30 seconds and then add the chopped chard, lemon juice, and a dash of salt and pepper. Stir well and let that cook down for about 3 minutes. Add the cream cheese, sour cream, and soy creme. Keep stirring it around until it melts and is completely incorporated into the chard.

Chop the artichoke hearts into quarters and toss them into the skillet along with the cooked orzo. Sprinkle the whole thing with red pepper flakes and mix well.

Preserved Lemons

A natural extension of not buying super processed pantry items is a foray into canning and preserving. I’ve been a bit lazy because there are TONS of local, ‘homemade’ options available here in Asheville that are made by people who think the same way we do about food. From watching my grandmother do it year after year, the canning process takes lots of work! Why do it myself when I can support local businesses by buying from these folks? Because, it’s a skill, and skills and their concepts are great things to understand. Plus, I’m just curious.

My desire to learn how to preserve food has been fermenting for a while {pun very much intended}, but something keeps stopping me. The truth—I’m scared, way scared. Terrified is probably a more accurate word. Botulism is no joke and this food safety, food-bourne-illness-germaphobe has some real issues trusting that I’m not going to kill my whole family with blueberry preserves. Real issues.

Shortly after our trip to Morocco, the Kiwi started begging me to give Moroccan food a go at home. The food we had in Morocco was out of this world flavorful, so I started doing some research and found preserved lemons in loads of the recipes. Thus began my search for preserved lemons so that I could put that tajine I got Zane for Christmas to good use. I love our local makers, but I haven’t seen preserved lemons here. Probably because most of us didn’t know they were a thing or maybe we think we have no need for them in our cooking. Unless you’ve tried them, you might think the same thing. But just you wait…

Anyway, where was I?

Oh right, I needed preserved lemons but couldn’t find any. I’d been chatting to an experienced food preserver about my desire to learn, the advice was always the same—start with something easy and something highly acidic. I saw Sarah’s post on how she made her own preserved lemons in only a week as opposed to the month it takes to make the real deal and thought that would be just the ticket! It looked so easy! So on a whim and high bout of self-confidence, I embarked on making my hacker version of preserved lemons. Seriously, it’s so simple a kindergartener could do it; well, a kindergartener you trust with a large chef’s knife…

Preserved Lemons from Kiwi and Peach

Preserved Lemons

4-5 organic lemons
around 1/4 cup of sea salt
pint sized canning jar

Scrub your lemons as well as you possible can and then dry them.

As thinly as your knife skills will allow, slice your lemons. As you’re slicing, pick out any seeds from your lemon rounds. Also, sit the ends to the side. We’ll be using them later.

Make sure that the jar you are using has been thoroughly washed with hot, hot, hot water and dried. Alternatively layer the lemon slices with a healthy amount of sea salt between each layer. You will rinse the salt off later when you use them in your cooking, so don’t skimp! It’s important! Pack the layers as tightly as you can, pushing down regularly as you go.

Stop a couple inches from the top and squeeze the juice from the ends into the jar then use the ends to push down and pack the layers really tightly. The goal is for any gap to be filled with juice. You can then toss the ends and put the lid on the jar.

Store it in your cupboard or a cool dark place for a week. You’ll know it’s ready when the rinds are soft.

And there you have it! Preserved lemons that will make you feel oh so fancy!

Once opened, I stored my jar in the fridge and it’s become my super quick go-to for recipes that call for lemon juice. I just sub in three or four rounds, depending on the size, per lemon. It’s been great in some of our older recipes like the pesto and avocado pasta, but it has also led to some wonderful new recipes! Now I just have to tackle the tajine…

chili {perfected}

Holy snow Batman! I thought I’d have to wait until the fall to share this one with y’all, but round three of ‘the vortex’ begged me to reconsider.

Since the beginning of our journey to eliminate processed foods, I’ve had a vice. My ultimate comfort food is my mom’s chili and my mom’s chili is what it is because of the chili seasoning she uses. The chili seasoning she uses comes in a little yellow packet and along with the usual suspects there were lots of extra man-made chemicals and processed corn product in there as well. I pretended they weren’t there.

Of course we couldn’t get it in Germany, but my mom would supply me with packets regularly in the mail and it was like a little taste of home every time. I had to get honest. Deep down I knew that little packet was exactly what we were trying to vanquish from our house and if there was ever a time to learn to make my own it was then.

So we ate chili, lots and lots of chili, and eventually, I nailed it. I know that chili can be a heated topic of debate. Some folks might object to my bean-filled pot, and that is fine—I object to your bean-free concoction. To each his own. If you are in the chili-with-beans camp though, and even if you aren’t {come over to the dark side y’all}, I promise this rezept won’t disappoint.

Every family seems to have their own chili recipe. I’m curious, what kind of chili did you grow up eating? 

{perfected} Three Bean Chili from Kiwi and Peach

Three Bean Chili

{makes about 6 servings}

for the seasoning:
2 Tbsp chili powder
2 tsp cumin
1/2 tsp cayenne pepper
1/2 tsp garlic powder
1 tsp onion powder
1 tsp whole wheat flour
2 tsp salt
1/4 tsp fresh ground black pepper
1/2 tsp cinnamon

for the chili:
1 lb grass-fed ground beef
1 medium white onion
1 clove of garlic
1 can black beans
1 can kidney beans
1 can pinto beans
1 (big) can diced tomatoes
1 can of tomato paste
2 cups of stock {Chicken, veggie, or beef will do. Beer works well too.}

{If you are a dried bean user, measure out about 1/4 cup of each type of bean. Go ahead and soak them overnight and cook them for about an hour before you add them to the chili.}

Mix up your seasoning in a small bowl. This recipe will make about 4 Tbsp of season and you will use all of it in the chili.

Start heating up your skillet on medium heat. While it’s getting hot, dice your onion and get the garlic ready to press. Once the skillet is hot, crumble your ground beef into it and give it a stir. Sprinkle a tablespoon of the seasoning over the meat and work it into the meat. Once a little of the fat has cooked out of the meat, add your onions and press the garlic into the mixture. Stir well and let it cook until the meat is no longer pink and the onions are soft, about 7-8 minutes.

Once the meat and onions are to your liking, transfer them to a 4 qt stock pot on medium heat. Add the beans, the whole can of tomatoes which you’ve crushed by hand—liquid and all, tomato paste, and the rest of the seasoning.

Stir everything in really well making sure that the tomato paste has dissolved and is completely incorporated. Add the stock and bring the whole shebang to a boil. At that point, reduce the heat to low and let it simmer for at least an hour but up to 3 hours. The longer you can leave it, the longer the flavors will have to get to know each other. If you want to leave it for longer than 3 hours, just add a bit more liquid.