Weekend Links

Happy weekend friends! What are you up to this weekend? Today we are said goodbye to the Cinque Terre and headed to Florence, and we stopped in Pisa for the day on the way. I’m tried to convince the Kiwi that it would totally be okay to take the tourist picture of us trying to hold up the tower but he didn’t buy it.

If you’re not already following us on instagram, now is the time! I’m posting all sorts of vacation photos {when we have wifi} so you can keep up with our adventures.

Have a great weekend!

Kiwi+Peach: Weekend LinksUp close and personal with some really cute animals.

A thought provoking article about marketing foods to children.

Why book an apartment as opposed to a hotel? {We will are in apartments for the rest of the trip and I could not be more excited!}

Hilarious chart for decoding what the Kiwi really means when he says ‘interesting.’

Cooking on vacation.

A look at the not so pretty side of the vitamin industry.

Beautiful photo series about what grandmothers all over the world are cooking up.

Some great ideas for meals made straight from the farmers market.

Lauren’s Summer Favourite

The Kiwi has lovingly volunteered to help me out and share a few recipes of his own while we are away on holiday. Today’s recipe was the first thing he ever made for me {before he even knew about my love of coconut}, so I find it quite fitting that it’s the first thing he is sharing with y’all as well! So, without further ado, I’ll turn it over to the Kiwi.


I have no idea what the original source for this recipe was—I appropriated it from a couple of friends I was staying with after watching them make it and then made it my own—so there isn’t really a name for it. This was the first thing I ever cooked for Lauren {having not yet located a supply of lamb mince in Munich to make my usual favourite}. Ever since then it’s just been known to us as “Lauren’s favourite”.

Suffice to say, this dish comprises a range of diced vegetables in a coconut sauce, served over pasta. As well as being extremely tasty, it features an agreeable spectrum of colours and feels perfect for a summer’s evening. If you’re feeling carnivorous, or you just have some leftover {cooked} chicken to use up, then you can stir it in at the end, but it’s really not necessary.

Kiwi+Peach: Lauren's Summer Favourite {written by the Kiwi}

Lauren’s Summer Favourite

The Pasta
200g {6 oz} whole wheat spaghetti
1tsp salt

The Sauce
½ a large zucchini
1 small red bell pepper
1 small yellow bell pepper
½ a large eggplant
2 tsp salt
1 Tbsp olive oil
1 tsp whole wheat flour
½ can {200mL or 6 oz} coconut milk
¼ cup grated parmesan cheese
⅛ tsp ground black pepper

Chop all of the vegetables into roughly 1.5cm {½ inch} cubes. Eggplant can sometimes have a bitter taste in the liquid around the seeds, so chop that first, place it in a bowl and sprinkle liberally with salt to draw out the moisture. Set aside while you prepare the other ingredients, or even do this step half an hour ahead if you have time.

Preheat a large frying pan on medium-high. You’ll be sautéing the vegetables so that they cook quickly without turning to mush.

Separately, bring a pot of salted water to the boil in preparation for the pasta. Where I come from not even the poorest English Lit grad student could imagine life without an electric kettle and this job takes two minutes. However, in America folks prefer to eschew such cheap and easily-available conveniences in favour of heating the water laboriously on the stove.

The zucchini takes the longest to cook, so add it to the frying pan first along with the oil and start sautéing. After a couple of minutes add the peppers and finally, after a few minutes more, wash the salt off the eggplant cubes and add them to the pan as well. You’ll want to begin cooking the spaghetti as directed at about this point. Continue sautéing until the vegetables are soft, but not yet starting to break down. This process takes about 5-10 minutes in total.

Reduce the heat to medium and add the flour to soak up any remaining oil. Stir for about a minute, then add the coconut cream. Grind in the pepper and grate in the parmesan cheese. I recommend moving to Europe, where you can bind blocks of genuine Parmigiano Reggiano in every supermarket fridge. That doesn’t make a big difference to the recipe; it’s just something I like to recommend.

Continue cooking and stirring for a few minutes until the sauce is thickened. Serve over the spaghetti with a little grated parmesan and black pepper for garnish.

Strawberry Margarita Cupcakes

Today we are headed to Cinque Terre.  I could not be any more excited.  Cinque Terre has been on my must-see list since study abroad in college, and I just had to include it on our Tour of Italy itinerary.  I can’t wait to hike the famous trail, eat pesto on giant slices of warm fococcia bread, and hang out on the rocky beaches.


Apparently the fancy cupcake trend is ending. This kind of breaks my heart. I love cupcakes. They are probably my favorite form of dessert ever. It satisfies my sweet tooth, there are a million and a half different combinations of flavors {Elvis cupcake anyone?} so I never get bored, and portion control is built right in. What more can you ask for?

I’ll grant you, this is not a healthy cupcake, but every now and then you deserve a treat. So before cupcakes become so 2012, why not whip this up for that summer cookout you’re having next week? Folks will rave. I promise!

Kiwi+Peach: Strawberry Margarita Cupcake

Strawberry Margarita Cupcake

{yield 9 delicious cupcakes}

The Cupcake
1/3 cup unsalted butter {room temperature}
2/3 cup sugar
1 egg
zest from 2/3 of a lime
juice from 2/3 of a lime
¼ tsp of vanilla extract
1 cup all-purpose flour
1 tsp baking powder
¼ tsp of salt
1/3 cup buttermilk

The Strawberry Margarita Filling
1/2 cup of strawberries
zest from 1/3 of a lime
juice from 1/3 of a lime
2 Tbsp tequila
¼ cup of powdered sugar
2 tsp cornstarch
1 tsp coconut oil

The Frosting
½ cup unsalted butter {room temperature}
1 ¼ cup powdered sugar
¼ cup strawberry margarita filling

Preheat the oven to 325˚ F.

Cream the butter and sugar together until the mixture is fluffy. Add the egg and mix well. Then mix in the lime zest and juice and vanilla.

While holding over the bowl, add the flour, baking soda and salt to a wire strainer {or sifter}. Alternate adding the dry ingredients and the buttermilk. Begin with the dry ingredients, then the buttermilk, then the dry ingredients, then the buttermilk, and then the rest of the dry ingredients. Don’t over mix it– mix until they are just incorporated.

To prepare your cupcake pan, line with the wrappers and either give them a spray with cooking spray or use a pastry brush to brush on a bit of melted butter or canola oil. {I did the latter because we don’t have cooking spray in Germany.} Once your pan in ready spoon the batter into the cups. Bake for about 30 minutes or until the top is springy and the edges are slightly browned. When they are finished, transfer them to a wire rack and let them cool completely.

While the cupcakes are a cooking, get to work on the filling and the frosting.

For the filling, add the strawberries, lime zest and juice, and tequila to the bowl of a food processor and puree the mixture until there are no chunks of strawberry left. Pour into a small bowl. Whisk in the powdered sugar and cornstarch until they have dissolved and then add the coconut oil. Give it a hit in microwave for 30 seconds and then whisk until the coconut oil is incorporated. Pop it in the fridge until you are ready to use it so that it can thicken up a bit.

For the frosting, cream the butter, powdered sugar and filling together in a large bowl until it is a frosting like consistency.

Once the cupcakes have cooled, use a strawberry corer {or a knife} to scoop out the middle of your cupcakes. Spoon about a teaspoon of the filling in the middle of the cupcake. Spread {or pipe if you want to be fancy} the frosting over the whole top of the cupcake making sure to cover the filling completely.

Then you could eat it as is… or you can decorate it! Top with a lime wedge or a bit of strawberry. Roll the rim of the cupcake in green sugar. Sprinkle with lime zest. Add a sombrero. Go crazy!

Sesame Chicken

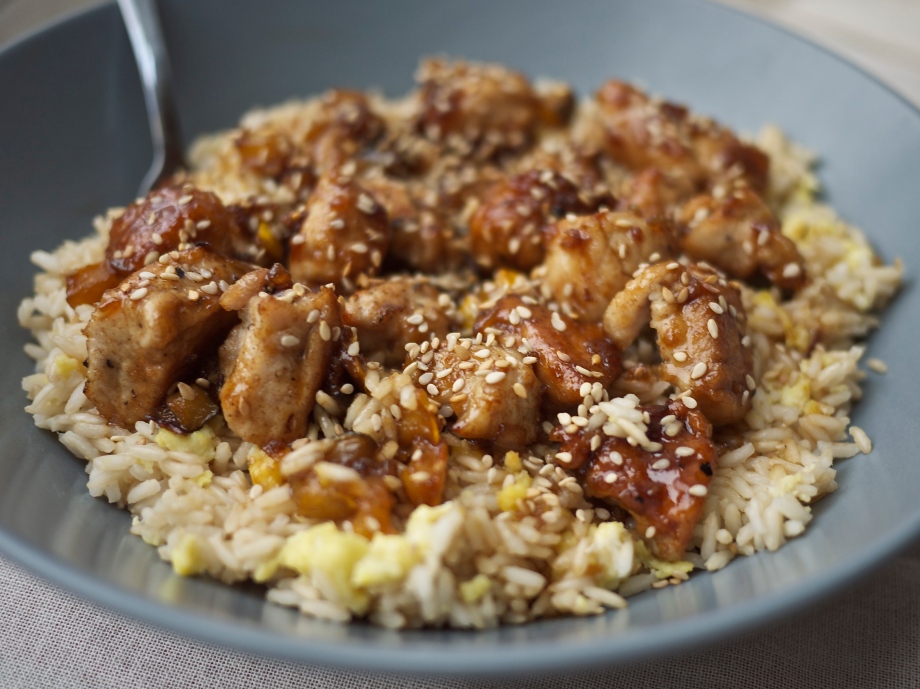
In college, my roommates and I wouldn’t think twice about ordering ‘Chinese’ take out. It was so easy! Our favorite place was just down the road, but of course we had them deliver it anyway. So we’d give them a call and 15 minutes later {give or take 5 minutes depending on if the dogs got out when the delivery guy showed up}, we’d be sitting down with our delicious, delicious General Tso’s, Mongolian beef, or sesame chicken… and a boat load of white rice… and maybe a egg roll or two. As good as it was though, we knew it wasn’t good for us.

About a month after I got to Germany, I started really craving some sesame chicken. The thought of trying to decipher German with a Chinese accent on the phone to order take out was just too much, but out of that moment of punking out came a wonderful discovery.

There are so many reasons to make your take out ‘Chinese’ yourself. Its not hard. {Okay. Its harder than it being delivered to your door, but technically speaking, its really not difficult to make.} It takes 30 minutes tops, it’s cheaper, and, most importantly, it’s so much healthier!

Kiwi+Peach: Sesame Chicken

Sesame Chicken

{adapted for two from Slender Kitchen}

The Sauce
3 cloves of garlic, minced
2 Tbsp soy sauce
2 Tbsp brown sugar
2 Tbsp white wine vinegar
3/4 cup chicken stock

The Rice
1 tsp olive oil
1 egg
1 heaping cup of brown rice
2 cups water
1 tsp salt

The Goods
2 chicken breasts
pinch of salt
a few grinds of fresh ground black pepper
2 tsp whole wheat flour
1 Tbsp coconut oil
whatever veggies you have on hand {I’ve used finely diced zucchini and onions and broccoli all with good results.}
1/4 cup sesame seeds

Preheat oven to 400°F/200°C.  Start heating an oven-safe pan on medium heat and a medium size pot on high heat.  Boil your jug too.

While all of that is heating up, grab a bowl and whisk together all of the ingredients for the sauce.

Then we’ll get the rice started.  Measure the water from the jug and add it to your pot.  Once its boiling, throw your salt and rice in and give it a stir.  Lower the heat to medium and set your timer.  Cook according to the package instructions {usually 25-30 minutes for brown rice}.

In the pan, heat the olive oil and crack your egg.  Scramble for a couple minutes until its cooked through.  Put the cooked egg in a separate bowl and set aside.  Return pan to the heat.

Cut your chicken into bite sized bits and add it to a bowl.  Add the salt, pepper, and flour and let sit for a minute while you chop your veggies.  Add the coconut oil to the hot pan and add your chicken and veggies.  Cook for about 3 minutes on each side or until the chicken has turned light brown.  Pour the sauce in the pan and transfer the pan to the oven.  Bake for 20 minutes.

When it’s finished baking, take it out and sprinkle with sesame seeds.  Serve the chicken over the rice and be proud you didn’t order take out!

Spanish Chicken

We leave for our two week Tour of Italy tomorrow!

Weirdly, this week has flown by {usually the week before vacation drags, yea?}, but it’s probably just because I’ve had so many last minute things to get done. My to do list is two pages single-spaced! I can’t wait to get on the road and just relax!

Even though we will be away, we don’t want you to worry. We would never just abandon you for two whole weeks! The Kiwi and I have made sure that you will still have some great content in our absence. We’ll have new songs for your kitchen playlist, some great links from around the web, and loads of great recipes like this one which according to the Kiwi is the “best thing in the history of the world, ever.”

Kiwi+Peach: Spanish Chicken

Spanish Chicken

{adapted for two from Life is Great}

The Chicken
2 bone in chicken thighs and legs
1 Tbsp olive oil
1 tsp fresh oregano, chopped
1 tsp fresh rosemary, chopped
salt and pepper
zest from 1 orange

The Sides
1 sweet potato
1 red onion
1/2 of a large chorizo sausage {about 4 ounces/125 grams}

Preheat the oven to 400°F/200°C.

Line a baking pan with parchment paper. Then wash the chicken and pat dry. Make sure it is really dry because we want the skin to crisp up! Put the chicken in the pan and drizzle with olive oil. Sprinkle with the herbs, salt and pepper, and the orange zest then rub everything into the chicken really well. Pop it in the oven for a total of 60 minutes.

After you’ve put the chicken in to cook, peel and chop your sweet potato into 1 inch sized bits. At the 45 minute mark, take the chicken out and add the sweet potatoes to the pan then return to the oven.

Next, peel and chop your chorizo into 1 inch sized chunks. Go ahead and slice your onion into thick slices as well. At the 30 minute mark, take the chicken and potatoes out of the oven and add the chorizo and the onions then return it to the oven.

At the 15 minute mark, remove the pan again and using a basting brush, spread some of that yummy chorizo juice on the chicken and then return to the oven for the last 15.

When it’s finished plate it up and enjoy!

Roasted Green Beans

Back in college, my friends and I would do what every other college kid does for spring break and go to the beach. There were a good number of us, so we rented this amazing ocean front apartment that had a pretty sick kitchen. After a couple nights of ridiculously long waits at pretty average restaurants, we decided to make use of said kitchen. Each of us made part of the meal, and while everything was delicious, the thing that stuck with me most were Jill’s green beans. “Really? Green beans?” you say. Really. While stupidly simple to make, they are simply out of this world. I bet they would be great on a grill too!

What about you? Do you like cooking on vacation? Part of traveling to me is checking out what the locals are eating. While I love going to random grocery stores and markets, when it comes to meals, we always search out a good restaurant filled with locals. However, this week The Kichtn is talking all about cooking while traveling, and I’m feeling a little inspired. Or maybe we will check this out.

Kiwi+Peach: Roasted Green Beans

Roasted Green Beans

Two handfuls of fresh green beans
1 Tbsp olive oil
1 tsp garlic salt

Preheat the oven on broil.

Snap the ends off the beans and remove the strings on the sides. Wash them and pat dry.

Spread the beans out on a lined baking sheet and drizzle with the olive oil and garlic salt. Give it a stir to make sure that all the beans are covered with the oil and pop it in the oven for about 10-15 minutes*. About halfway through give them a stir. You’ll know they’re done when they start to crisp up.

*Time varies based on your oven. In the States, the top element in the oven seems to be very strong so it might be more like 10 minutes. Here it’s more like 20 minutes.

Veggie Drawer Pasta

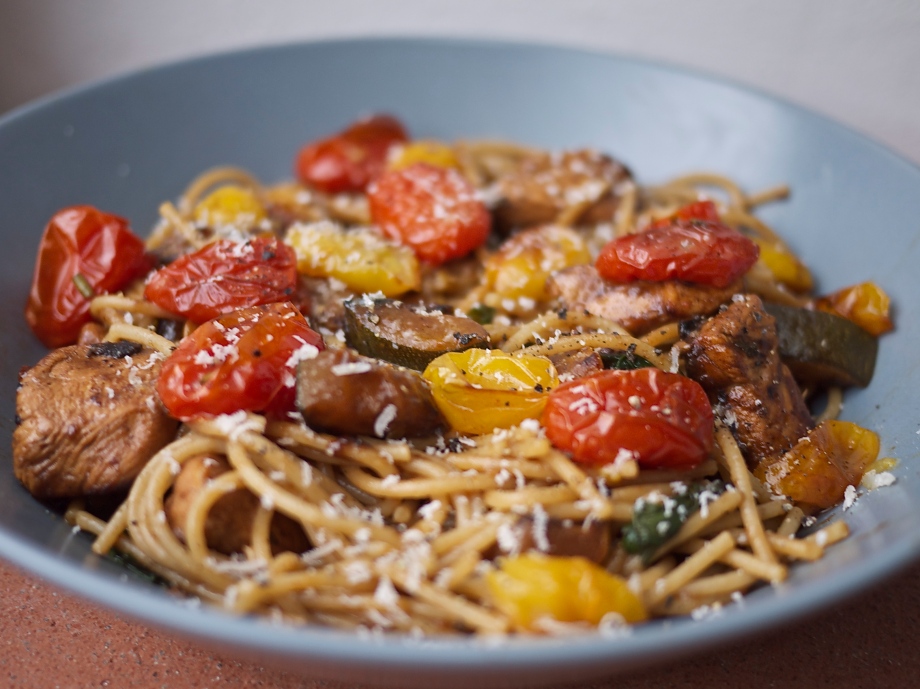
A big part of cooking for two is planning your meals so that you can use leftover ingredients before they go bad. For the most part, I’d say that the Kiwi and I do pretty well on that front, but we certainly aren’t perfect. Veggies are the hardest for us. We always end up with random halves just hanging out on the veggie shelf.

It’s always handy to have a couple super flexible recipes up your sleeve so you can just use up anything that is about to go off. This is one of my favorites for using up leftover veggies. You can throw just about any veggie in this and it’s going to taste great.

Veggie Drawer Pasta

{heavily adapted for two from Goddess of Scrumptiousness}

The Marinade
2 chicken breasts
1 Tbsp olive oil
juice from 1/2 of a lemon
zest from 1/2 of a lemon
salt and pepper

The Tomatoes
15 cherry tomatoes
1 tsp fresh rosemary, chopped
1 Tbsp olive oil
salt and pepper

The Pasta
4 oz whole wheat pasta

The Veggies
1 Tbsp olive oil
whatever you have on hand {I’ve had success with zucchini and bell peppers, but spinach would be great too.}

The Garlic Sauce
2 Tbsp butter
1 Tbsp whole wheat flour
2 cloves of garlic
1 cup chicken stock

Preheat the oven to 300F/150C.

First we need to put our chicken in to marinate. Cut your chicken breasts in to bite sized pieces. In a small bowl mix your marinade ingredients together and toss the chicken in. Coat well with the marinade and put it in the fridge until you’re ready for it.

Slice your cherry tomatoes lengthwise and scatter them on a lined baking pan. Drizzle with olive oil and toss on your rosemary, salt, and pepper. Give it a stir so that all the tomatoes are covered and pop it in the oven for 45 minutes.

Take a break. Have a nice glass of tea and peruse Pinterest for a bit.

When the tomatoes have about 20 minutes left start heating a large pan on medium high heat. Boil your jug and start heating a large pot on medium high heat too.

When the jug finishes boiling put your pasta on. Cook according to the directions in the package {usually 11-13 minutes for whole wheat}. When the pasta is finished drain the water and set it to the side.

Chop the veggies you’re using into bite sized pieces and grab your chicken from the fridge. When your pan is nice and hot, pour in the olive oil and add your chicken and veggies. Let cook them cook for about 3 minutes on each side.

Now we’re going to get fancy with the sauce. Push the chicken and veggies to the edges of the pan making a whole in the middle like a donut. Drop in the butter and when it’s melted sprinkle with flour. Add your minced garlic. Slowly add your chicken stock whisking while you pour to avoid clumps. Stir your chicken and veggies in with the sauce and then let it simmer away for about 5 minutes our until the sauce is thick enough for your liking. Add the pasta to the pan and mix well. Plate up and top with the roasted tomatoes and some yummy parmesan cheese.

Venice Food Guide

The Kiwi and I are getting so pumped about our Tour of Italy. {We leave in 4 days!} I cannot stop thinking about all the delicious, delicious food we are going to be eating. I’m just a little excited. Can you tell?

Since I have Italy and traditional Italian food on the brain today, I thought I’d share a few of my tips for where to eat in Venice. The Kiwi and I have both been to Venice pretty recently {him for the 2011 Biennale, me in April with my mom}, so we are not including it on the Tour. However, I do think that Venice is a must-see town if you’re in the area. Unfortunately, apart from the squid ink risotto, Venice is not necessarily known for great food, but I’m going to fill you in on a secret. Venetians love their cicchetti and they do it very, very well. This might as well be called “A Cicchetti Guide to Venice,” because every place on my list in a cicchetti bar.

Cicchetti bars were traditionally where folks stopped on the way home from work for a glass of wine and a bit of socializing. Here’s the rub though, folks didn’t want to be drinking all this wine on an empty stomach because they might end up in the canal before the dinner bell even rang. So cicchetti are small bites that you can have with your wine, but that won’t spoil the dinner that is waiting for you at home. Or you can do what we did–order several and make it your meal. {We saw Venetians doing this too. It’s kosher.} The best part about this is that they are generally pretty cheap and you get to try lots of different things!

So here is how it works. You walk into the bar and give the folks behind the counter your best ‘Salve!’ Most cicchetti bars are family run and the person you see behind the counter has probably been there since 5am. Smiles are nice. There will be a glass case full of cicchetti. Have a look at what they have to offer and get to pointing. “Uno {point}, due {point},” you get the gist. They will hand you your food and wine, and then you can find a spot to eat standing up with all of the other locals. I’m not going to lie, this is not for the faint of heart. You probably won’t have a clue what you are eating and it might not look like something you want to put in your mouth, but do it anyway. I never had a bad cicchetti. Not once.

Enoteca Al Volto
Calle Cavalli, San Marco

This was our first cicchetti experience and the owners were so incredibly sweet helping us figure out what to do/order. There is a restaurant part as well, but I can’t vouch for it as we just had cicchetti. The food was delicious {try the marinated artichokes, or the crostini with a big hunk of blue cheese drizzled with balsamic} and the atmosphere cozy. The whole ceiling is covered in wine bottle labels. A great first experience.

ProntoPesce
opposite the Fish Market, San Polo

Right opposite the fish market, the offerings change daily based on the catch of the day. It is pretty much a one man show. The owner gets the fish from the market fresh each morning. Then he cooks up some incredibly tasty bites and when it’s gone it’s gone. I think it’s safe to say that the bites here are a bit more of a modern take on traditional cicchetti recipes. I am not a I know little and less about wine pairings and usually defer to the Kiwi on that front. That said, I can remember that white wines go well with fish. This place has some great local whites that were just perfect with our little bites of brioche with smoked swordfish, mascarpone, and cherry tomatoes and a lemon marinated anchovy couscous that tasted like no anchovy dish I’ve ever had before {meaning that it was good and not crap}.

Cantina do Mori
just off Calle Arco, San Polo

This is said to be the oldest cicchetti bar in Venice. It used to be where people would go to refill their bottles of wine from these huge ‘kegs.’ {That’s not what they are really called. I can’t for the life of me remember their proper name, so I’m going with keg.} Anyway, it is now a bar that offers some heavier cicchetti. There were lots of sliced meats on crostini and fried veggies. Along with these bites they have some great wines that are still served from the ‘kegs.’

Another anecdote… In each square in Venice there is a old well. Each well is different. Way back when, if folks needed water they’d go to the well and fill their copper pots with water to take home. The walls and ceiling at Cantina do Mori are completely covered with those old copper pots.

All’Arco
also just off Calle Arco, San Polo

This is family run cicchetti bar is part of the slow food movement. I found it really interesting because they cook and prepare your food right in front of you when you order. The cook in me really enjoyed seeing how all of these spreads and bites are made. It takes a bit more time, but it’s definitely worth the stop. This is a lunch place and closes at 2.30, so get there early.

{Other Venice Advice}

I am not usually a big fan of organized tours. {My exception is bike tours, but we can talk about that another day.} However, I wholeheartedly recommend the Cicchetti Tour. Our guide, Cecelia, was a local whose knowledge of food culture and slow food blew me away. Plus it’s nice to be told what you’re eating one in a while, yea? Cantina do Mori and ProntoPesce were on our tour, but, as we were there the week after Easter, we apparently were not going to the usual places because they were closed for the holiday. So they may or may not be on yours.

If you’ve had enough of cicchetti bars and want to actually sit down to eat your food, Lauren over at Aspiring Kennedy has some great restaurant recommendations too.

Stay in one of the residential areas {the Dosoduro, the Cannaregio, or the Castello neighborhoods}. We stayed in an apartment in the Dosoduro and it was great! Nothing is really that far of a walk in Venice, but if it is, hop on a vaporetto.

Put down your map, get off the main route, and get lost. You see so much more that way!

Linked with Travel Tuesday

Chicken Pesto Pizza

When I was growing up, Friday night was pizza night. My earliest memories of Friday Pizza Night was scarfing down Pizza Hut while glued to Boy Meets World on TGIF. This later evolved into scarfing down Dominoes on my way to football games, but I think we can see the trend.

Not all pizza is made for scarfing though. While granted Pizza Hut and Dominoes are not the kings of culinary sophistication, pizza can be so much more than just a “junk food.” It’s a blank canvas that you can fill with all your favorites in creative and tasty ways. It can even be…healthy.

The Kiwi and I can do some damage to this size of a pizza. I usually only end up with one piece for lunch the next day. However, if you were to have a nice side salad with it, I’m sure you could eke out a few extra slices to get you through lunches for a couple of days.

Chicken Pesto Pizza

The Base
pizza dough
½ cup pesto

The Toppings
½ of a red onion
1 Tbsp olive oil
1 chicken breast
pinch of salt and pepper
½ cup of grated cheese {I used gouda, but parmesan or mozzarella would be good too.}

Preheat your oven to 475°F/240°C. {The longer your oven preheats the better. You want a really hot oven!}

Start heating a pan on medium high heat. While it’s heating up, slice your onion. When it’s hot, melt the butter in the pan and add your onions and brown sugar. Give it a good stir and let them cook for about 5-8 minutes or until they are nice and caramelized, stirring frequently. Transfer to a small bowl and set aside. Return the pan to the heat and add the olive oil.

While the onions are caramelizing whip up your pesto. Then get to work on the chicken. Cut it into bite sized pieces and sprinkle with some salt and a few grinds of black pepper. Pop the chicken into the pan and cook on each side for about 3 minutes.

Spread a healthy layer of pesto on your rolled out pizza dough. Then layer on the caramelized onions and the chicken. Finally top with grated cheese, and pop it in the oven for about 10-15 minutes or until the crust is a bit brown around the edges and the cheese is all melted. Slice it up and enjoy!